How to build a Machine Learning Model for Business Optimization with MindsDB using a DigitalOcean Droplet and Docker


Introduction
In the world of business, churn is a critical metric that measures customer attrition or the rate at which customers stop doing business with a company. High churn rates can be a significant problem for businesses, as they can lead to a loss of revenue and reduced profitability. In this article, you will explore a real-world use case of machine learning applied to churn analysis. By analyzing customer data of large volumes, the machine learning algorithm you will build here can identify the factors that contribute to churn and as such, you would have built a predictive model to forecast future churn rates. With this information, businesses can take targeted actions to retain customers and improve their profitability over the long term.
In this tutorial, you will create a Linux-based virtual machine that runs on top of virtualized hardware using DigitalOcean (i.e. a DigitalOcean Droplet) and Docker. You will then deploy an instance of the MindsDB on the droplet, build a Machine Learning model by uploading a .csv file using a churn use case in the telecommunication industry and then predict the rate at which customers stop doing business with the company over a given period (i.e. churn).
Prerequisites
To follow through with this article, you will need:
A basic understanding of Machine Learning and how it works. You can read about Machine Learning models and how they work here.
A DigitalOcean account if you don't have one yet. You are provided with $100 credits when you sign up. Alternatively, you can harness the $200 free credit from the GitHub Student Developer Pack.
A MindsDB account. If you don't have one, sign up for a free account here.
What is MindsDB?
Let's do hypotheticals for a minute. Let's say there was a team of problem solvers who wanted to use machine learning to help their organization make better decisions. They knew that building machine learning models required extensive coding and data science expertise, which they didn't have. That's when they discovered MindsDB, an open-source automated machine-learning platform that allowed them to train, test, and deploy models with simple SQL statements.
MindsDB offered a range of powerful tools that made it easy for the team to analyze data, engineer features, and train models. With MindsDB's AutoML capabilities, the team could quickly and accurately train predictive models with minimal manual intervention. The platform used advanced algorithms to identify patterns in the data and generate accurate models that could be used to make predictions on new data.
What's more, MindsDB was flexible enough to customize models to meet specific business needs and support a range of data sources, including SQL databases, CSV files, and APIs. With MindsDB, the team was able to democratize machine learning and make it more accessible to a broader range of users, enabling organizations to leverage the power of AI and drive innovation and growth.
In all, they realized that MindsDB is a game-changer for organizations looking to leverage the benefits of machine learning. With its powerful tools, AutoML capabilities, and flexibility, MindsDB makes it easy for anyone to build and deploy predictive models with ease.
Step 1: Setting up Docker on the DigitalOcean Droplet
There are two ways to set up docker on a DigitalOcean droplet.
In the first method, you will start by creating a new Droplet. To do this, you will click on the Droplets option on the left panel on the dashboard.

Once you are in the Droplets Dashboard, click on Create Droplet.

Next, you will be directed to the Create a Droplet dashboard, where you can customize the configuration of your virtual machine and select additional applications from the Marketplace if desired. In this case, you will proceed with the default configurations that provide sufficient performance to launch a standard virtual machine.
| Distributions | Ubuntu 20.04(LTS) x64 |
| Choose a Plan | Shared CPU (Basic) |
| CPU Options | $20/mo (4GB/2CPUs, 80GB SSD Disk, 4TB Transfer) |
| Datacenter Region | Closest Region to you to reduce latency (London for me) |
| Authentication | SSH Key (If you have one) or Root Password (Set your Root Password below to login to the VM) |
| Select Additional Option | Choose Monitoring and IPv6 which are free services |
| Finalize and Create | Set the number of Droplets you want (1 for now) and the Name of the Droplet |
| Select a Project | Leave as default |
Once the Droplet is created, connect to it using SSH. Furthermore, before installing Docker, it is recommended to update the system to ensure that you have installed all the necessary packages. Run the following command to update the system:
sudo apt-get update
Thereafter, you will install Docker by running the following command:
sudo apt-get install docker-ce
Once Docker is installed, you can verify the installation by running the following command:
sudo docker version
This will display the version of Docker installed on your Droplet.
By default, Docker runs as the root user, which is not recommended for security reasons. To create a new Docker user, run the following commands:
sudo groupadd docker
sudo usermod -aG docker $USER
This will create a new Docker group and add the current user to the group and then you are good to go.
The second method is much simpler. You will simply go to the DigitalOcean homepage and select Marketplace at the bottom left corner, search for Docker there and select Docker on Ubuntu directly. Since you would be using Docker to install the MindsDB server on our Droplet, instead of choosing a Ubuntu LTS distribution and then installing docker on top of it manually as done in the first method, with this method, you can do that directly.


Thereafter, using the configuration settings for the region, droplet type, CPU option, and authentication method similar to the ones in the first method, you will create the droplet. You can enable the Droplet Console to run operations in the top-right corner.

Regardless of the method used, you can test that Docker has been installed by running a simple Docker command such as:
docker run hello-world
This will download and run the "hello-world" Docker image, which will print a message to the console as shown below:

Note: You are using Docker containers to deploy MindsDB as opposed to deploying on the droplet directly because, with Docker, you get to combine software and related dependencies into a standardized unit for software development that includes everything it needs to run: code, runtime, system tools and libraries. This guarantees that your application will always run the same.
Step 2: Deploying MindsDB on the DigitalOcean Droplet
In this step, you will deploy the MindsDB server using the command line.
docker pull mindsdb/mindsdb
The line of code above should pull the latest production image of MindsDB to your Droplet and the output look like this:

With that done, you will publish the ports so that you can access the endpoints and communicate with the MindsDB server in your Droplets. As such, you will first expose the MindsDB GUI port running the commands below:
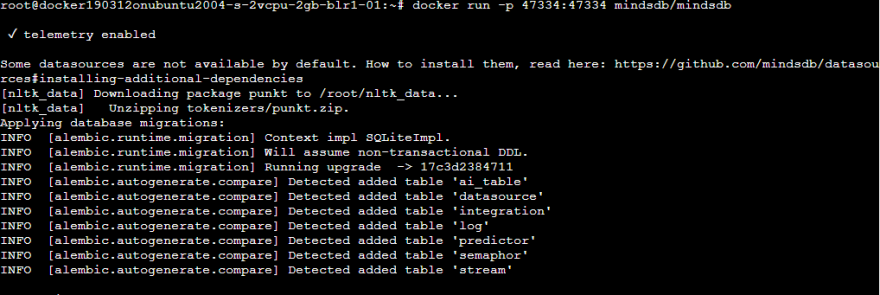
docker run -p 47334:47334 -p 47335:47335 mindsdb/mindsdb
You will see the following output:
Now, you can access the MindsDB GUI using the Droplet IPv4:47334 port. The Ipv4 IP address can be copied directly from the dashboard and thereafter, you will add the port for the MindsDB server - :47334.

The GUI looks like this and you can now get to work with MindsDB.
Note: If you require more information or prefer to install MindsDB using an alternative method to Docker, you can refer to the MindsDB Getting Started documentation.
Step 3: Uploading the data
The dataset for this tutorial was gotten from Kaggle and a link to it can be found here.
MindsDB boasts a range of integrations that facilitate its compatibility with various data sources. Through these integrations, users can swiftly connect and import data from databases like MongoDB, PostgreSQL, and MySQL as well as cloud-based services such as Google Sheets. In this particular tutorial, you will employ the online editor and commence by uploading your preprocessed data. First, it is recommended that you rename the .csv file for this tutorial to churn.csv for ease. To initiate the process of uploading the data, click on the Add button and select the Upload a File option.
You will manually upload the .csv file from your local device here.

It is crucial that you take note of the name assigned to your Datasource as it will be utilized later.
Upon successful upload, you will see an interface resembling this displayed:

To get a peek at what the dataset looks like, disable line 7 by commenting it out, and then select Run or use the Shift and Enter commands.
Your result at the bottom will be similar to the output shown below - it would be the first ten rows of the dataset.

Now that you have seen a peek at the dataset, you will now need to understand the dataset, its features and labels.
The Dataset
You will be working with a dataset of customer churn in a telecommunications company. The context is to be able to predict the behavior to retain customers. You can analyze all relevant customer data and develop focused customer retention programs.
| Column | Description | Data Type |
| A list of all columns in the dataset | A brief description of each column (i.e. features and labels) in the dataset | The type of data that each column contains. |
CustomerId | The identification number of a customer | character varying |
Gender | The gender of a customer | character varying |
SeniorCitizen | It indicates whether the customer is a senior citizen (1) or not (0). | integer |
Partner | It indicates whether the customer has a partner (Yes) or not (No). | character varying |
Dependents | It indicates whether the customer has dependents (Yes) or not (No) | character varying |
Tenure | The number of months the customer has been staying with the company. | integer |
PhoneService | It indicates whether the customer has a phone service (Yes) or not (No) | character varying |
MultipleLines | It indicates whether the customer has multiple lines (Yes) or not (No, No phone service). | character varying |
InternetService | Customer’s internet service provider (DSL, Fiber optic, No) | character varying |
OnlineSecurity | It indicates whether the customer has online security (Yes) or not (No, No internet service | character varying |
OnlineBackup | It indicates whether the customer has an online backup (Yes) or not (No, No internet service). | character varying |
DeviceProtection | It indicates whether the customer has device protection (Yes) or not (No, No internet service). | character varying |
TechSupport | It indicates whether the customer has tech support (Yes) or not (No, No internet service). | character varying |
StreamingTv | It indicates whether the customer has streaming TV (Yes) or not (No, No internet service) | character varying |
StreamingMovies | It indicates whether the customer has streaming movies (Yes) or not (No, No internet service). | character varying |
Contract | The contract term of the customer (Month-to-month, One year, Two year). | character varying |
PaperlessBilling | It indicates whether the customer has paperless billing (Yes) or not (No). | character varying |
PaymentMethod | The Customer’s payment method (Electronic check, Mailed check, Bank transfer (automatic), Credit card (automatic)) | character varying |
MonthlyCharges | The monthly charge amount. | money |
TotalCharges | The total amount charged to the customer. | money |
Churn | It indicates whether the customer churned (Yes) or not (No). | character varying |
- All but the last column (which is a label) are features. In general, a feature pertains to the column employed in training the model (the x variable in simple linear regression). A label on the other hand is a column whose values will be predicted, serving as the y variable in simple linear regression.
Step 4: Building your Machine Learning model
In this step, you will create, train and evaluate your Machine Learning model.
Since you now have your data uploaded to the MindsDB editor, you can easily create this model that will assist the business in making predictions for future churn rates. Recall that in this tutorial, you will be predicting and identifying the customers who are likely to stop using the telecommunication service so the company can take appropriate actions to retain them.
You will be using the churn column of the dataset being the label to predict this possibility.
CREATE MODEL mindsdb.customer_churn_predictor
FROM files
  (SELECT * FROM churn)
PREDICT Churn;
In the block of codes above, you use the CREATE MODEL keyword to create a model. Thereafter, you are selecting the file churn (your Datasource name) to use for building the model. Finally, you will use the PREDICT keyword to predict with the Churn column (our target variable). After running the above command, you should get something similar to this:

The predictor may require several minutes to complete training. To track the predictor's progress, you can employ this SQL command:
SELECT status
FROM mindsdb.models
WHERE name='customer_churn_predictor';

In the screenshot, we can see that the status of this model is complete. That means the model is done with training.
Step 5: Using the model for prediction
For the prediction for this tutorial, you will use values demo values for a hypothetical person, and predict if they will stop using the telegram service
SELECT Churn, Churn_confidence, Churn_explain
FROM mindsdb.customer_churn_predictor
WHERE SeniorCitizen=0
AND gender='Female'
AND tenure=2
AND PhoneService='Yes'
AND MultipleLines='No phone service'
AND InternetService='DSL'
AND OnlineSecurity='Yes'
AND OnlineBackup= 'Yes'
AND DeviceProtection='No'
AND TechSupport= 'Yes'
AND StreamingTV= 'Yes'
AND StreamingMovies= 'No'
AND PaperlessBilling= 'Yes'
AND PaymentMethod = 'Electronic check';
Using the following options for the features, we can predict the likelihood of the user opting out of the telecommunication service.

Note: You can perform further analysis, preprocessing, and exploration of the data to enhance the accuracy of your predictions. Moreover, you can fine-tune the model hyper-parameters to improve its performance.
Conclusion
In this tutorial, you have learned how to harness mindsdb's automated machine-learning capability to analyze customer behavior and feedback. With the predictive model deployed on a DigitalOcean droplet that integrates Docker, you hosted your instance of MindsDB on the cloud which allowed you to streamline the development, testing and deployment processes.
For the telecommunications industry use case, you used MindsDB to automate the process of building, training and deploying machine learning models, eliminating the need for extensive programming or data science expertise. With this, businesses can make informed decisions and take targeted actions to retain their customers and improve their profitability over time.
All the commands used can be found on GitHub.